Film Study #1: Camera Pan vs Track
- Maurits Valk

- Feb 16, 2024
- 6 min read
Updated: Apr 11
Scene reference for this post: The Lord of the Rings: The Fellowship of the Ring. Film studies are a great way to improve your storyboarding and other filmmaking skills. In this first film study we'll be breaking down a short sequence from the first installment in a great trilogy of films. This scene contains well crafted camera moves and subtle tricks to help make the audience feel what the characters are feeling.
There are two camera moves we are going to focus on. The first is a camera pan and the second is the camera track. If you are unfamiliar with camera moves, here is a great article on Stream Semester explaining the different types.
The Lord of the Rings films generally have these wide and sweeping camera moves to help show the environment. This conveys scale, showcases the beautiful landscape of New Zealand which lends to world building and also enhances the production value. The more you show in one frame the more that goes into the making of that shot. These long sweeping moves are not necessary in every movie but it's good to study the entire original trilogy to learn where you can use them in your own work.
We'll skip the first shot in the YouTube but it does establish the screen direction which leads us into the shot below where the camera booms down, dollies in a bit and settles as our characters settle between the trees.

The next shot we cut around to the other side of Gandalf, over the shoulder of Frodo. This cut is motivated because Gandalf turns towards Frodo and Sam at the end of the previous shot. The background canopy of trees frames Gandalf nicely which is more than likely intentional since they do not need to be standing where they are in the previous shot. Gandalf asks Frodo, "Is it safe?" which motivates our next cut to see Frodo's reaction.

Frodo looks up at Gandalf and without having to safe anything he lays his hand on his pocket that contains the Ring. There is a brilliant sound cue as Frodo touches the pocket, it sounds like a heart beat which helps convince the audience he's connected to the Ring.


Gandalf crouches down to Frodo's height making for a more intimate conversation. He is delivering important information to Frodo so it makes for a nice touch to have them on the same eye line. The same eyeline typically establishes similar levels of importance so there is that minuet in this shot. The camera is booming up and tilting down which is probably to capture the motion of Gandalf crouching and to keep his face clearly composed over Frodo's shoulder.

This next shot starts to dolly towards Frodo. We continue that dolly movement over the next two shots until the camera settles on Frodo's pocket (or the Ring rather). This movement is important to note because if we end a shot while the camera is moving it's best to continue that movement into the next shot. The movement is motivated and feels natural until the camera settles.


This next shot is tighter on Gandalf and we are now on a single (meaning there is one person in frame). Gandalf finishes delivering the last important piece of information regarding the power of the Ring. Notice how we started wide and progressively got closer and closer to the subjects of the scene. This is common practice in filmmaking when establishing new scenes and characters converse with one another.

We cut to see Frodo's reaction. Notice how the heads are framed the same between the previous shot above to the shot below but they feel different in scale. The previous shot is probably shot on a wider lens that sits closer to Gandalf's face making him feel larger. Gandalf's hat and general silhouette is naturally larger but the difference in cameras help convey character scale which is good to note. The shot of Frodo below is probably shot on a longer lens (also known as telephoto lenses) which are generally used for portrait shots.

The next shot cuts straight to Gandalf on his horse turning away from the hobbits. This shot has a lot of movement in a tightly framed shot. We are not wide on Gandalf which helps convey to the audience a sort of confusion and intensity so we feel what Frodo and Sam are experiencing watching Gandalf leave in a hurry. The next two shots continue to get wider on Gandalf as he leaves the scene with the third shot ending on the same camera setup as the original boom down shot at the beginning watching the three characters settle in the forest.

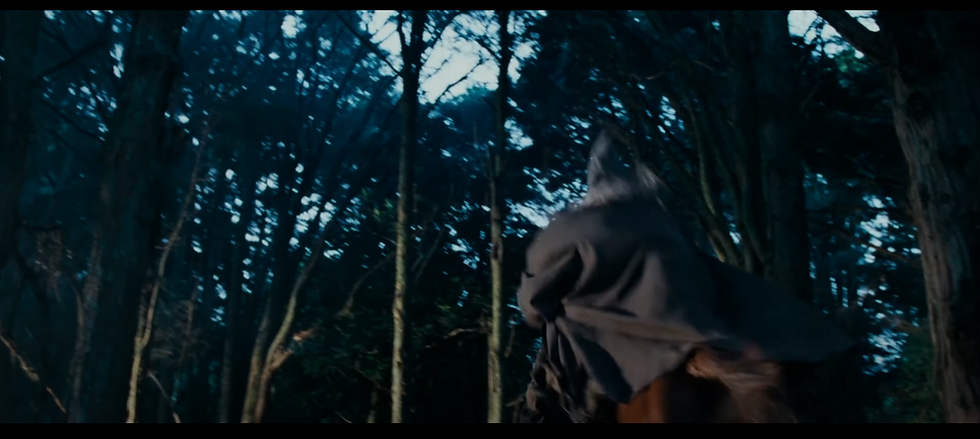

Last frame of the third shot below. Note the tree branches in the foreground of the shot. As the camera booms into the branches it motivates our next cut to look at the forest canopy.

We are looking up at the forest which is revealed to be a subjective shot from Frodo's point of view at the end of the shot. It is not a direct POV shot as if we are looking out of Frodo's eyes but it's clear we are experiencing what he and Sam are experiencing. An objective shot would be as if we would be watching them from afar looking up at the forest. (Difference between Objective and Subjective shots). This shot has two parts to it. The first three images below are part one which tells the audience the crows cawing ('beasts' and 'spies' as Gandalf referred to) are stalking Frodo and Sam. We experience this tilting down and orbiting shot which is generally disorienting to the audience. At the end of this part one, we see Frodo is visibly shaken as Sam looks onto him.


It's important to note that this one shot has two parts because there are two story points in this one shot. The first being the crows flying away while Frodo and Sam react to their new mission without Gandalf. Part two of the shot is a different camera move that shows Sam and Frodo move on with their journey. Sam steps closer to Frodo reassuring him and Frodo then takes a deep breath walks screen right towards camera. The next camera move in this one shot is just a pan of Frodo leaving frame. Frodo pushes the camera so the audience gets the sensation of watching Frodo leave and the camera hands off to Sam who then begins to follow Frodo. This is the first camera move I wanted to point out in this scene and we'll soon see the difference between a pan and a tracking move.


The next three shots show Frodo and Sam travelling left to right through the Shire.


After the short montage of Frodo and Sam hiking with the use of objective shots we land on a trucking shot of Frodo and Sam in a corn field. There is a lot of depth in this shot and great use of triangle composition with the scarecrow in frame (not doing his job well).

We cut wide and high to reveal where Frodo and Sam are. They are small in frame which helps convey Sam's fear of traveling further than he's ever gone before by being surrounded by landscape.

Frodo walks toward Sam motivating our next cut closer to Sam and Frodo. The tables have turned now and Frodo is the one supporting Sam. Once again, there is triangle composition and a lot of depth (foreground is the characters, middle ground is the scarecrow, background are the fields behind them). The second camera move I wanted to showcase is this track. When Frodo and Sam leave the forest the camera panned and watched them leave. Now we have the same idea of the characters moving left to right but instead of panning the camera is tracking with them. This gives the audience the sensation that we are walking with Sam past the furthest point he's ever been. It helps us feel what Sam is going through. This is a prime example of the difference between what a pan can provide to the audience versus tracking. It is generally a very subtle thing but can be incredibly impactful for the audience.


We cut back to the same camera setup high above the corn field as they traverse it. There are probably three total camera setups in this cornfield scene.
The first wide shot of Frodo ahead of same
The high shoot that is likely on a boom arm since they probably couldn't destroy the cornfield with a track.
The third being the medium shot of Frodo helping Sam walk into the corn crops.
Notice the placement of the scarecrow is different in the three camera setups in relation to the corn. This is probably an easy prop to move and to help compose the shots well (this is called movie magic).

The last shot in the sequence is a simple but long tilt down showing the grand nature of the trees and the characters are again small in frame which shows their surroundings is ever present and dominating their journey.

The key takeaway from this film study is to note how different camera moves can make the audience feel. The next time you do a film study, be sure to slow down and go frame by frame to see how the camera is actually moving. Count the different camera setups and try to figure out what lenses they are using (roughly, wide, medium, long). You can use the '<' and '>' keys on your keyboard on YouTube or use this frame by frame website to click through videos frame by frame.


Comments